
Jan 2012: Next up was dealing with the lack of paint, and the overspray that was under the bed. I had a single stage spray can in matching color made and I went to town masking and spraying. The entire under bed box skirts needed some attention.


This:

Turned into this:

Feb 2012: The final part of the 5th wheel hitch was finished at the start of January, and the Ramcharger finally parted, it was time to move onto the next item. Next on the list was fuel tank plumbing. At time of this writing, is not even yet finished.
The first test was with an old rad hose to confirm a 45* angle would be what was needed. It proved correct.

So out to the auto parts store….


And the fuel doors aligned and installed:

The other item being simultaneously worked on is the remained of the air distribution system. The air tanks and air lines for the front half of the truck are being redone to accommodate the 4” turbo back exhaust. After a recent incident of melting the airlines in the 1990 due to an exhaust mishap, I thought it would be wise to learn from past experience. This would also allow me to simplify the distribution center with a homemade distribution block.

So that brings us to mid February 2012. It seems this has taken a bit longer than the few hours I had at the airport almost a half week ago, but hopefully this is of some interest and makes the time reading worthwhile. I will continue to update as the project continues with hopeful completion being in summer 2012. If there is any questions or if I skimmed over something too fast, please let me know! I also hope you are not asleep at the computer now! 😀
Oooook. Where did we leave off…. I have been doing more working and less typing but I am back to sitting and waiting so I will do another update…
First thing was to get that box off my work table as I need my bench back and that thing is huge! So I tackled the remaining items on the frame.
So first off was the Ramcharger fuel tank. Remember this?

Well, it was time to do it right. So with the wiring harness from this:

I would finish it right:


With the wiring done on the tank, it was time to extend the auto level valve for the rear. When it sits at ride height it is about 4” short so it was time to lower it:


Next up was the filler necks. After the welding of the front neck (to allow for the FASS return as well as incoming fuel from the rear tank) I rocker guarded them for extra durability as they are right before and aft the tire.


And then applied the foam to the tops to seal against the body. And yes that is NOS foam. 😀


Next was solidifying the support tabs and finishing the weld:

Next was some wiring of the dually fender marker lamps. I will make the mating half when the box is on:


So, it was check list time:
Bolt torque? Check.
Wiring finished? Check
All air lines connected? Check
Hitch paint touched up? Check
All good to go? Check
Invite 3 people over to lift? Check


And so the box goes on and the taillights go it….

Yes, NOS lights: 😀


Next up was the box. It needed to have 4 holes drilled that align perfectly with the hidden hitch rails below. Not if drilling fresh sheet metal is not enough, how about fresh paint too! 😀 (Take note the soot in the bed from the other truck! LOL)


And perfection!

Next was the filler necks. The front was easy, the rear posed some issues. See, the ramcharger tank elbow was not long enough and the 45 deg hose was also a little short to meet up with the filler heck on the fender side. So I had to cut 4” of pipe and use some more hose to bridge the gap:

And the front was easy:

And done!

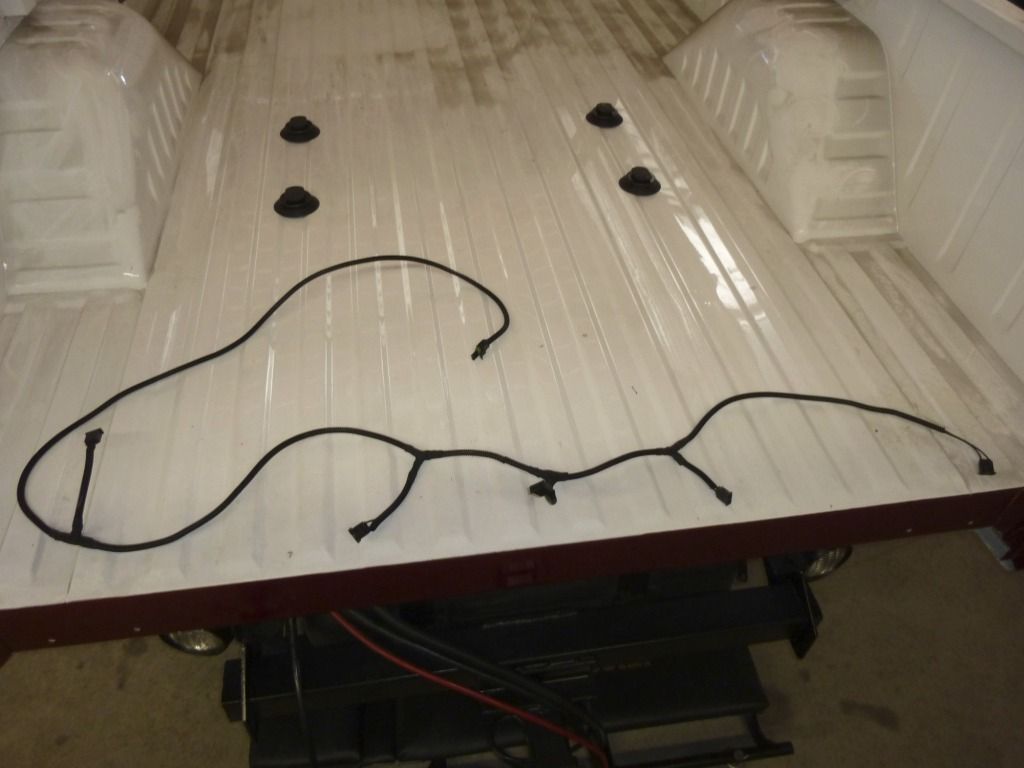
Next up was the wiring harness for the tailgate. See the truck was originally a W250 so it did not have a harness. And as I could not find one, I thought I would make my own.

Soldering time!

Bingo!
And as I was building wiring harnesses it seemed like a good time for the extension harnesses for the dually fenders. Why do they need extension harnesses? Good question. Seems the previous owner liked to cut them as only one remained!

So going with wiring, I thought I would do the fenders next:


And as they were on my other bench and bugging me, I did a few other small items.
First hood donkey went on:


And the wiper motor:


And the water pump for the onboard tank:

Continued fab on the air distribution block for underneath the truck:

And something we have not discussed in a while, the turbo! LOL I decided that the factory waste gated housing I had on would not be CFM efficient for my application so I changed to a 16 cm non WG housing:


Next up was one of those finds that will help the first gen truck crowd: Clutch hydraulics. I ordered a HD clutch hydraulics kit from SBC as I now have a DD clutch. So when it arrived imagine my surprise when it was an entire first gen system that Dodge used minus the fluid reservoir. The reservoir is a second gen unit, but with a quick swap you have a brand new 1st hen set up for $325! So if you are replacing stock, it is the HD kit! So I will use the kit so I have a reliable hydraulic setup. The lines did not go in at this point however as I need a new reservoir as the 2nd gen is a different profile as my first gen unit is fatigued. So it will sit off to the side for now.


And then the cover for the heater box clean out hole I made. Installed that and sealed it:

So the next item is one of those items that is a one in a lifetime find. For any of you who look for NOS parts, this will interest you. For those that like first gen parts, this will shock you. And for those that like factory take offs, hold on to your pants! This will get you excited!!
While cruising the TDR forums I caught wind of a brand new 1993 W250 tailgate that was in OR. The truck was taken home from the dealer, the tailgate was pulled, and then put in a closet in the house, and then left there for 20 years while the truck used a 5er gate! Best part is the tailgate trim that I was actually looking for was still attached! Any of you that know tailgates know that the trim gets bashed when the gate is bumped, dropped on the trailer jack handle, scratched when you lean on it, and then the red strip on them starts to let go of the glue from the sun! And this thing was used for a few days! There was not even a scratch on it! So logically it needed to make its way to Canada….


Here is can be seen with the 2010 Dodge Caravan overhear rear console that will be the main overhead console in this truck:

